Paper light box (Shadow box) It can be used as a wonderful home deco, or a unique birthday or wedding gift.
You can mount it on a wall, or place it on a desk and enjoy its charming beauty. Basically, this light box consists of paper cut outs layered on each other in a box with a glass panel. LED lights are placed behind all the layers, which makes each layer glow, giving this 3D look. I’ll show you how I made this light box step by step, and also I’ll give you some tips that will help you achieve the desired effect.
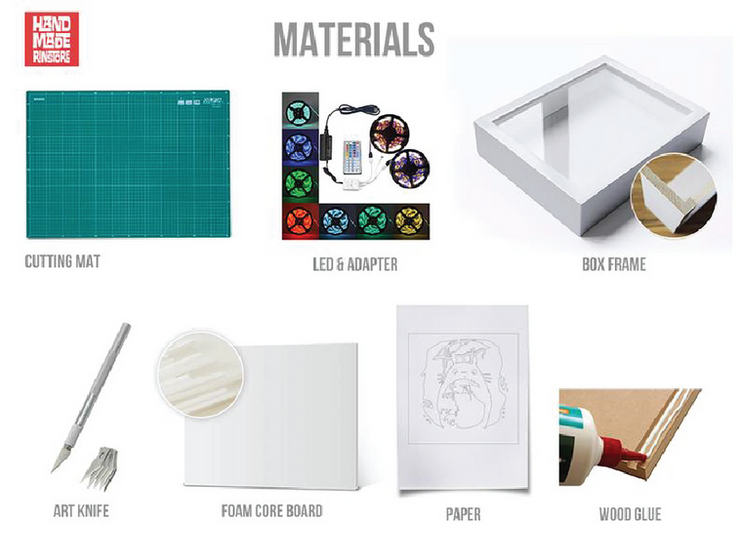
Here are the materials I used:
+ Paper
White card stock (170 grams thickness) http://amzn.to/2s2BncV
I recommend using 170 grams white card stock, because it’s stiff enough to stand up and thin enough to let the light pass through. But with big shadow box, you should 200-220 grams
+ X-Acto knife http://amzn.to/2t2Sx9v
+ Wood glue http://amzn.to/2tFVjzs
+ RGB LED strip lights http://amzn.to/2sC5tm8
+ Glass panel or mica
+ Foam core board http://amzn.to/2t6wG1t
+ Template Download https://www.3dpaperlightbox.com
So, the first thing you need to do is to download and print out the template. It’s made for a 18 x 18 cm (24 x 24 cm) light box , but you can scale it up and down if needed.Contact with me to scale files. You can also make your own unique design.

How to make 3d Paper Light Box with simple way
Print templates
Normal print mode reduces the size of images so select the do not scale(actual size) print mode to be able to print exactly the size Different software will display different print modes
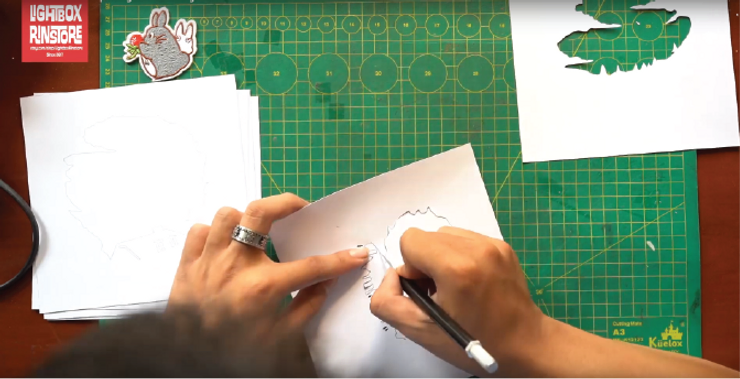
Cutting templates
Once you’re done with the first layer, cut it out using an X-Acto knife. X-acto knife is an original cutting tool designed to deliver the sharpest, most accurate cut on your projects.
Cut it out, and repeat this process until you are done with all the layers.

How to make 3d Paper Light Box with simple way
Reassemble the Layers and Glue Them Together.
The layers are reassembled with foam spacers in between each one. This gives the image the appearance of depth and creates a 3D effect.
I cut out the foam spacers. They are all 1 cm wide.There should be 4 spacers on each layer.
Then, I glued the layers together. I’m going to glue spacers around the edges of the first layer and then glue the next layer on top of it. Make sure the layers are properly lined up. Repeat this process until all the layers are glued together.

How to make 3d Paper Light Box with simple way
Put Some Lights in the Box.
Put a light strip all around the box. I cut the lights to the right length and stuck inside the box. You can put them wherever you want!
You can use different light sources, for example fairy lights, or LED lights, it depends on you. I highly recommend using RGB LED strip lights because they are self-adhesive, flexible, you can cut them to size, and you can easily change colors, which will provide better effect. Also, they barely generate any heat. So, they are perfect for this kind of project.Once I’m done with the lights, I tread the power cord through and glued the back down.

How to make 3d Paper Light Box with simple way
Set up light shape

How to make 3d Paper Light Box with simple way
You can see more instructional tips at
https://3dpaperlightbox.com/blog/
You can also share your experiences or download free samples at
https://www.facebook.com/groups/lightboxtemplates
Thank you for reading!!!
Leave your comments to let me know what you think
if have any question please contact
#paperlightbox #paperlightboxtutorial #3dpaperlightbox
Paper light box, shadow box, light box svg, Templates light box, paper cut light box, paper cut light box template, light box svg, lightbox svg,paper cut light box svg, 3d paper cut light box, 3d light box svg, lightbox, shadow box template, night light, anniversary gift for him, 3d shadow box svg, light box template, paper light box template, die cut, Theater paper paper cutting, paper light box, lightbox template, shadow box svg, paper cut